In this fast-paced life of the digital era, we often depend on the internet to find most of our solutions. Business, Medical Sector, Educational sector, and every other essential part of life is connected and available on the internet through different websites and millions of contents. Among them, Video contents are the most popular and widespread content to which most people are engaged. People are regularly involved in these contents, increasing by around 63% due to the pandemic. If you haven’t thought of making any video content yet, it’s time to do it. It will help your growth in the profession, whether it’s product video or educational video.
The benefits of instructor-created video in online courses include increased student engagement and learning, increased instructor presence, and a greater student-to-instructor connection. This brief guide will help you get started if you teach online but do not have immediate access to a media studio or multimedia developer.
If you, however, are already an expert in editing videos in Filmora, or looking for a standalone offline solution, you can try Movavi Video Editor. Apply color filters, use Chroma Key, or even make the video black and white – there are plenty of cool things you can play with to create a stunning movie.What do you need to make a video?
Every work starts with planning and ends by successfully executing it. To do the work, you need some tools and, in this case, that equipment, video editing software, and planning to make the whole process done. Here are the things that you need to create your content:
- Equipment: – To record a video, the first thing you need is a video recording device like a camera, webcam, or even mobile phones and a computer to work with video files and edit them to the required one. You can record through your camera and edit the recorded files or directly record via webcam through or laptop or computer. Make sure the quality of your video content is high enough to edit later.
- Recording software: – You can take the help of computer screen and audio recorder software like Wondershare DemoCreator to screen record from your computer’s screen. Screencast software can help to record tutorials and gameplays or daily streaming. However, you can capture from webcam through this software. You can set the parameters like scale size and framerate for each kind of recording.
- Video editing software: – After you have recorded your footage, it’s time to edit it through some video editing software. If you use Wondershare DemoCreator video editing software, you don’t need to worry about another software as it provides you editing features. You can use the basic features like crop, trim, rotate, resize, and advanced effects like annotation, transition, and effects. This will provide your video content with an attractive viewer-friendly touch.
- Planning: – Now that you have all the equipment and the basics, you need proper planning to execute and get your required video. When you are trying to interact with your viewer through a video, there are few things you need to know.
- Choose Talking Points: You have to confident about what you will say when there are thousands of viewers who are learning and interacting through your content. Make sure you choose your talking points wisely and don’t say more than what you need to. Practice can make it perfect.
- “Chunk” the Material: Shorter your lectures and make it to the point. Content in chunks are usually more engaging. Researchers at MIT found that many students stopped viewing videos that exceeded nine minutes about halfway through.
- Set the Stage: Choose a well-lit recording location. Be mindful of what will appear behind you. Try to keep a clean and simple background that focuses on you or an office-like background for a more personal touch.
Record and edit online instructors
You can record your video in two ways, by screen recording and webcam recording or camera recording. In both cases, make sure your audio components are perfect. Add your voice synchronously or add voiceover when editing. Wondeshare DemoCreator allows you to record from your computer or screen and microphone as well. You can enable both of them or anyone as per your need.
Screen record

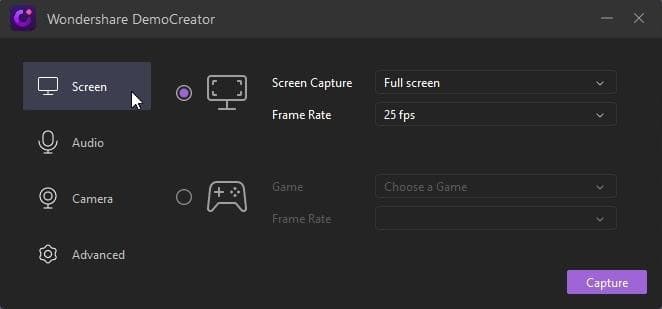
- Open DemoCreator and select “Capture”, a red button to start recording and set the parameters first. There you will find a window of settings. You will find four tabs, Screen, Audio, Camera, and Advanced. Choose capture region from the screen, Set and enable audio, Setup camera scale size and frame rate, and lastly, set your location for the file to save.
- Now that the parameters have been set, you can start recording by clicking on the record button or press the F10 button. To stop the recording, do the same.

- In case you want to pause your recording, click the Pause button or press the F9 button. To resume the recording again, do the same.
- After the recording is done, the file will be saved in your destined location.

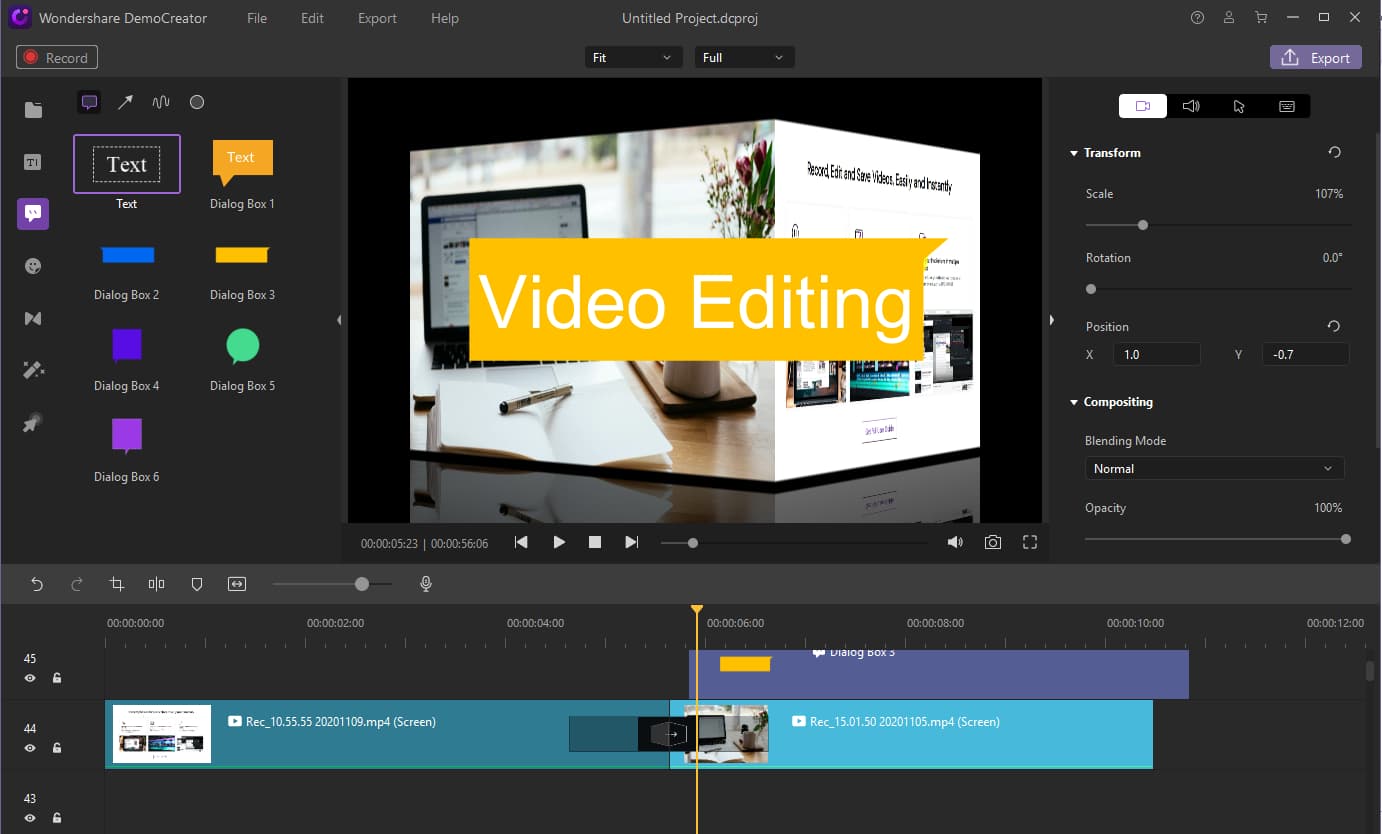
Video editing
To know how to edit the videos, you need to understand how to use the following features:
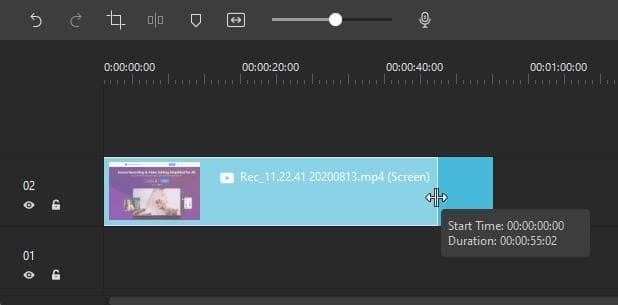
1. Add Media – Drag and drop the media file from your media library to add it to the timeline or right-click on it to ‘Add to timeline at Playhead.’ Reposition them if you need them later.


In General
Videos for instructional purposes should be technologically well-produced. Keep your individuality and humble approach to people, the viewers, and the students. Students want to learn from you, and the benefit of a more casual lecture approach is increased personal connection. Don’t hesitate to record and edit a tutorial video using DemoCreator.